
Laura’s Sourdough Tips and Schedule
The ~ slow ~ life and making sourdough are a match made in heaven. When we hit lock-down in 2020, I along with millions of other people decided to learn how to make sourdough.
I find following a recipe exactly, very difficult so I wasn’t sure how it was going to go. But I was able to produce a sourdough that tasted delicious, rose effectively and developed a good crunchy crust! It’s not perfect but it’s homemade with love so it’s good enough for me (and Ted).
Here’s a bit of info, some tips and then the schedule I follow.
Tips and Tricks
Take your time - sourdough and fermenting in general needs time. Don't rush your starter prep or the bulk fermentation phase.
Be aware of temperature - you will have to adjust your timings if it’s a particularly warm or cold day.
Just start! The first one isn’t going to work out (well it could!) and that’s totally ok - no-one is expecting you to nail it the first time so you shouldn’t expect that from yourself. Get conformable with failing (a good lesson from life!).
Get a well functioning sourdough starter from a friend! No need to make your own (unless you really want to). Raglan/Hamilton folk reach out if you want one!
Definitely do the main fermentation afternoon on a day that you’re home.
The flour I use for feeding the starter is 50/50 white flour and rye flour - but 50/50 white and wholemeal also a good option.
I personally ditch about 90% of my starter for each feeding, I find this is a really good way to get from zero to hero (inactive starter to very active and bubbly).
Using a vivid to mark and see how much starter expands is optional but a good practice if getting a newish starter going.
Equipment
Good glass jar with piece of material/small tea towel held on with elastic band
Large stainless steel bowel for fermentation phase
Accurate scales
Plastic scraper
Banneton - if you don’t have one of these - don’t let this stop you - just use a regular bowl (I used a ceramic salad bowl for ages before buying a banneton).
Teatowels - or square of linen for lining bowel/banneton while dough in fridge overnight
Dutch oven - not essential but very good for getting crunchy crust
Bread lame (I still don’t have one of these!) - scissors are perfect alternative
Baking drying tray
How to ‘Turn’ Your Sourdough
During the build fermentation stage, we ‘turn’ the sourdough (also called folding or even the ‘stretch and fold’) every half an hour for the first 2 hours, and then on the hour for the next few hours.
I think a video will be best to show you this (coming soon!) but for now, grab one side stretch it up and out as far as you car, then fold it over to the other side. Turn the bowl 90 degrees and do again 3 more times.
Sourdough Schedule
This is a schedule I created where the main fermentation phase is on a Friday afternoon and baking Saturday morning. Adjust the days accordingly (making a day later for a fermentation Saturday afternoon and bake Sunday morning).
This schedule also assumes the starter is somewhat mature and you’re just taking it out of the fridge or waking it up - not starting from scratch.
Starter Preparation Phase
Tuesday Evening
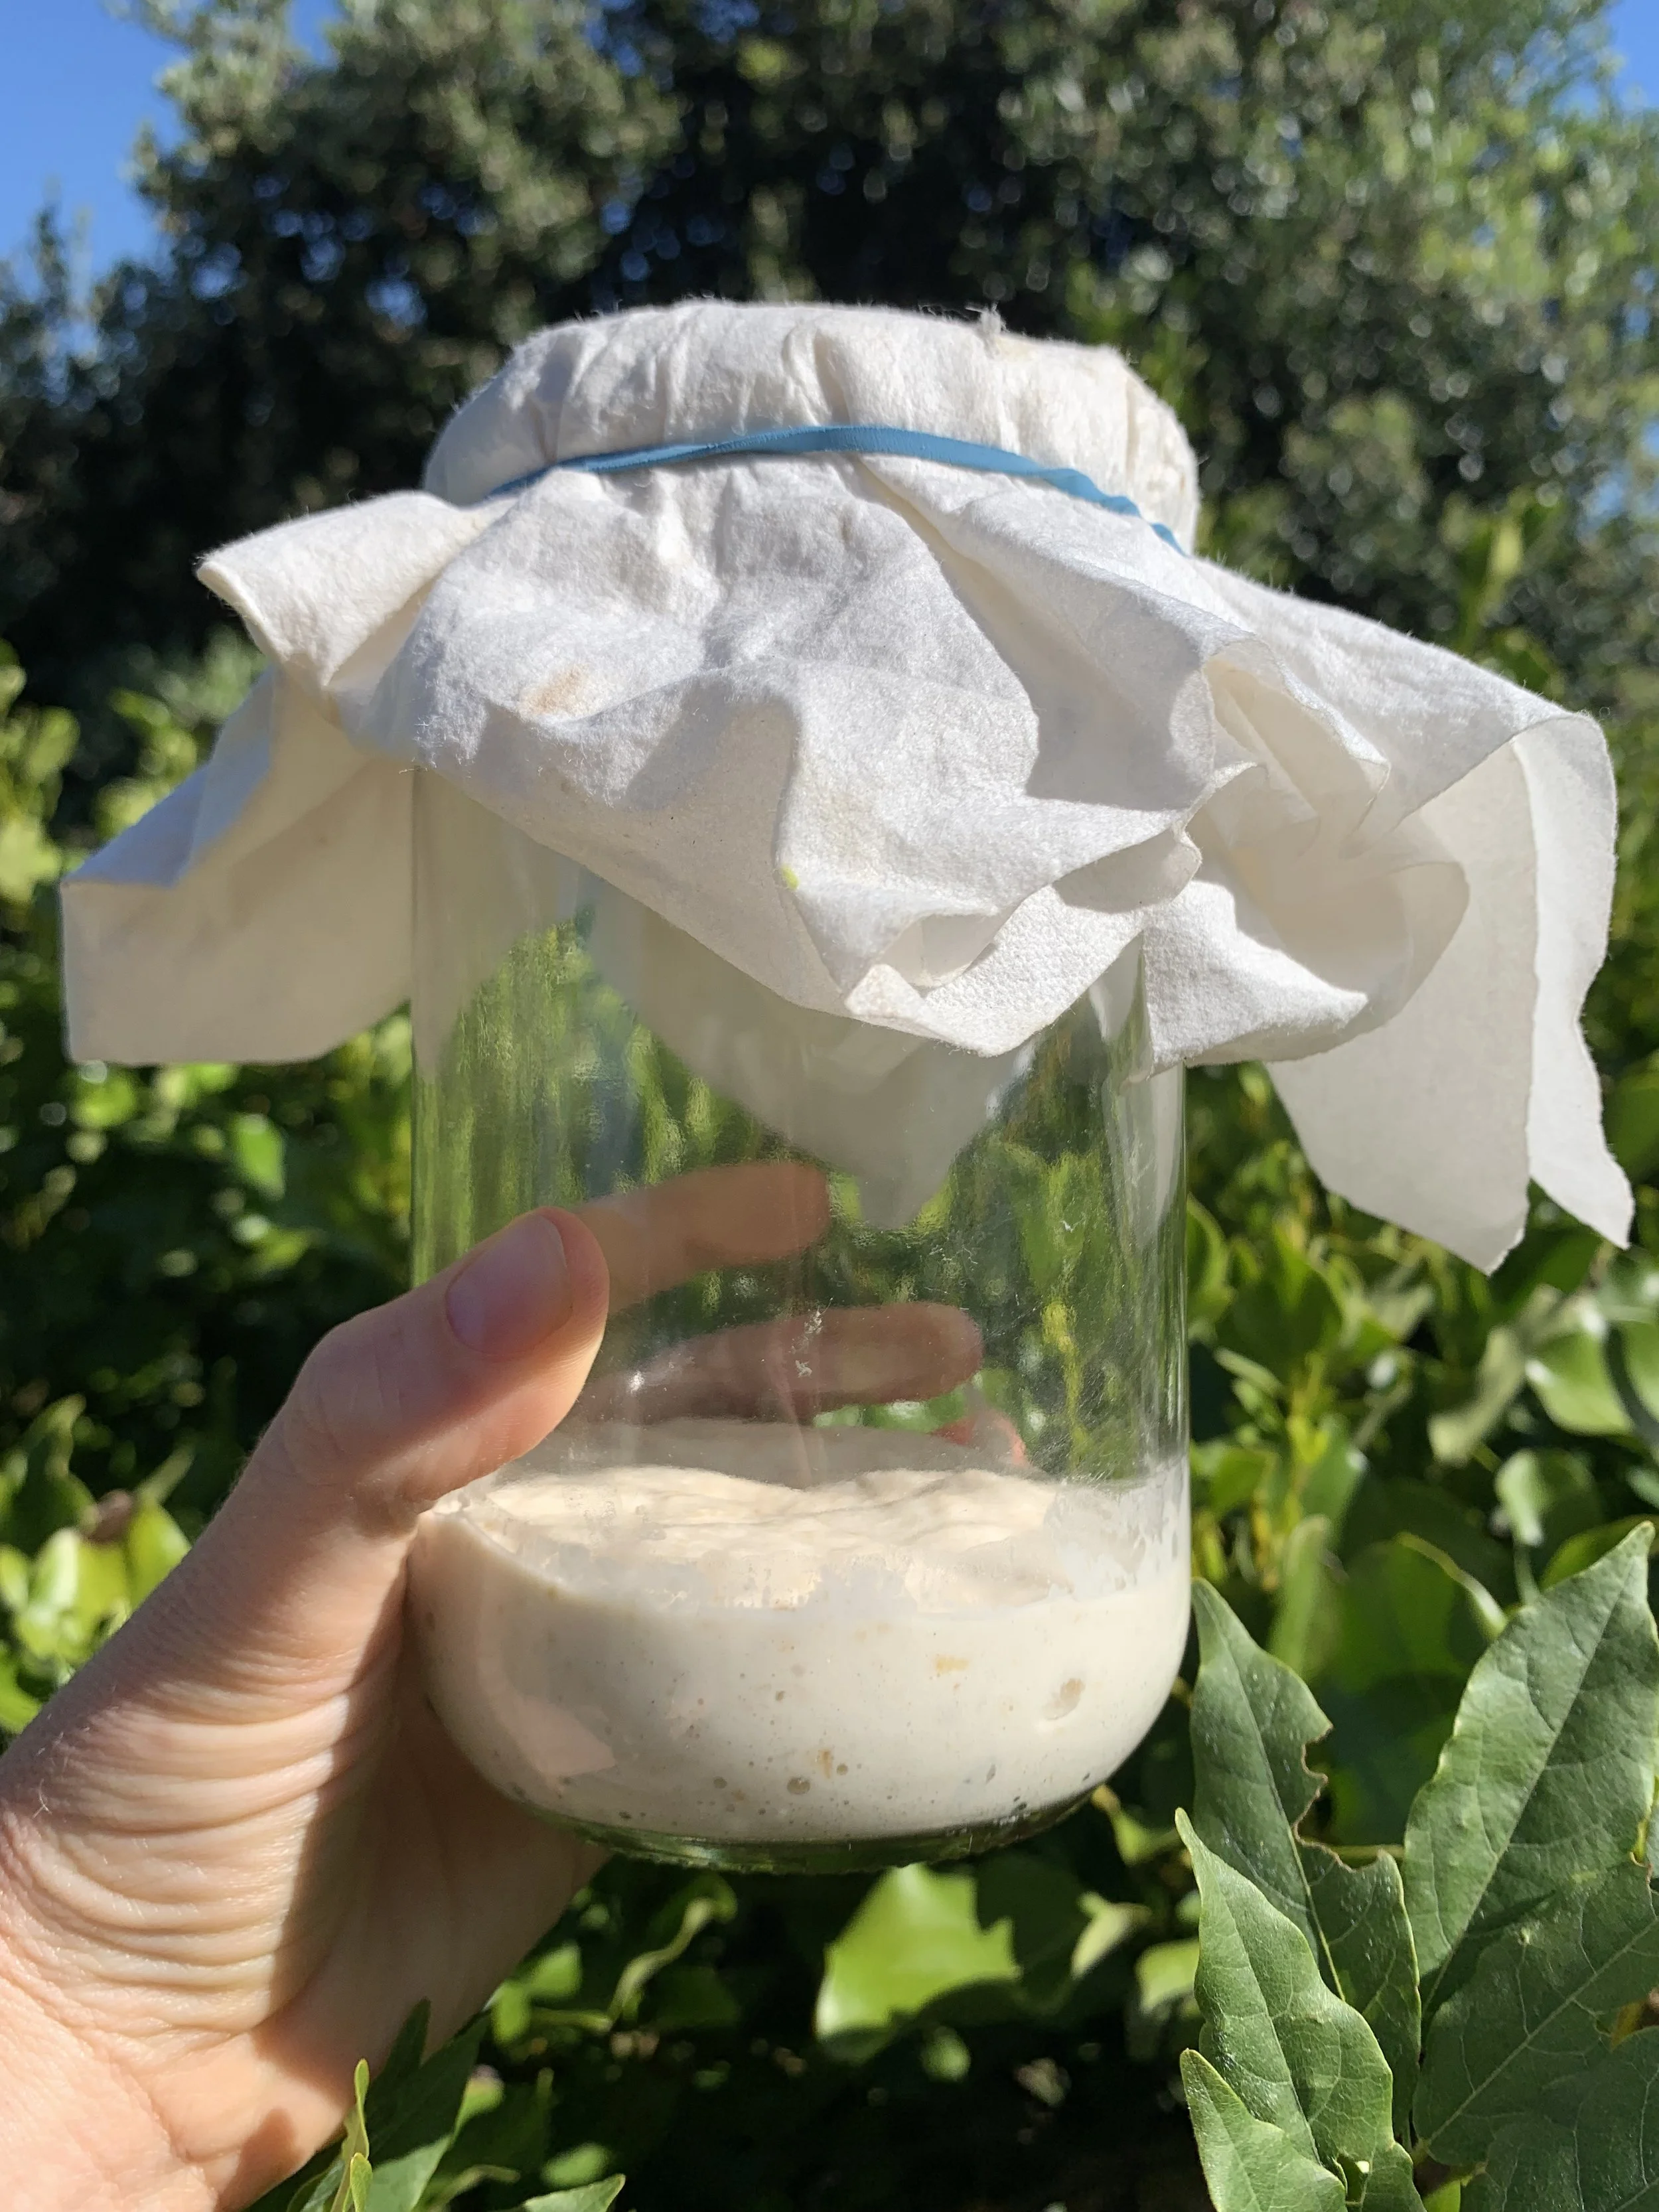
Ditch 3/4 of starter and feed with equal weights of water and flour (50g water, 50g of flour is a good size feed) - this is a small refresh feeding
With a vivid - draw a line on the jar to where the starter comes up to (that way you can see how much it increases in volume!)
Best to keep starter in a glass jar that’s easy to clean and use something breathable over top of jar (not a normal lid) like some material, muslin or a small tea towel. See the image below
This is what the sourdough starter looks like just after a refresh feeding
Wednesday Evening
Check starter activity, smell and where it comes up to on the jar (it should be up above the line and there should be bubbles)
Refresh feeding - ditch 3/4 of starter and feed with equal weights of water and flour
Thursday Morning
Check activity, smell again (there should be bubbles and volume gained)
Refresh feeding - ditch half of starter and feed with equal weights of water and flour
This is an additional feeding so that it’s super active and happy for the following day but if you miss this one - it’s not a big deal. One feeding per day is usually enough. (When it’s hot - this feeding is required).
Thursday Night
Check activity and smell again (there should be bubbles and volume gained)
Refresh feeding - ditch half of starter and feed with equal weights of water and flour (maybe more like 60-70g of each of water and flour for this feeding).
Leaven and Bulk Fermentation Phase
Friday Morning
8am (ish)
Check activity (if it’s not super bubbly and super active, it might be best to wait one more day for the starter to be ready to use)
Make leaven - 100g warm water and 100g of the 50/50 white/rye flour (in smaller stainless steel bowl with tea towel on top in warm place). (I’m actually a bit lazy and just do this in my starter jar now esp if I’m just doing one loaf.)
Friday Afternoon
12pm (ish)
This is approx 4 hours after the leaven is mixed (temperature dependant!) - so if you make leaven at 10am - do this stage at 2pm.
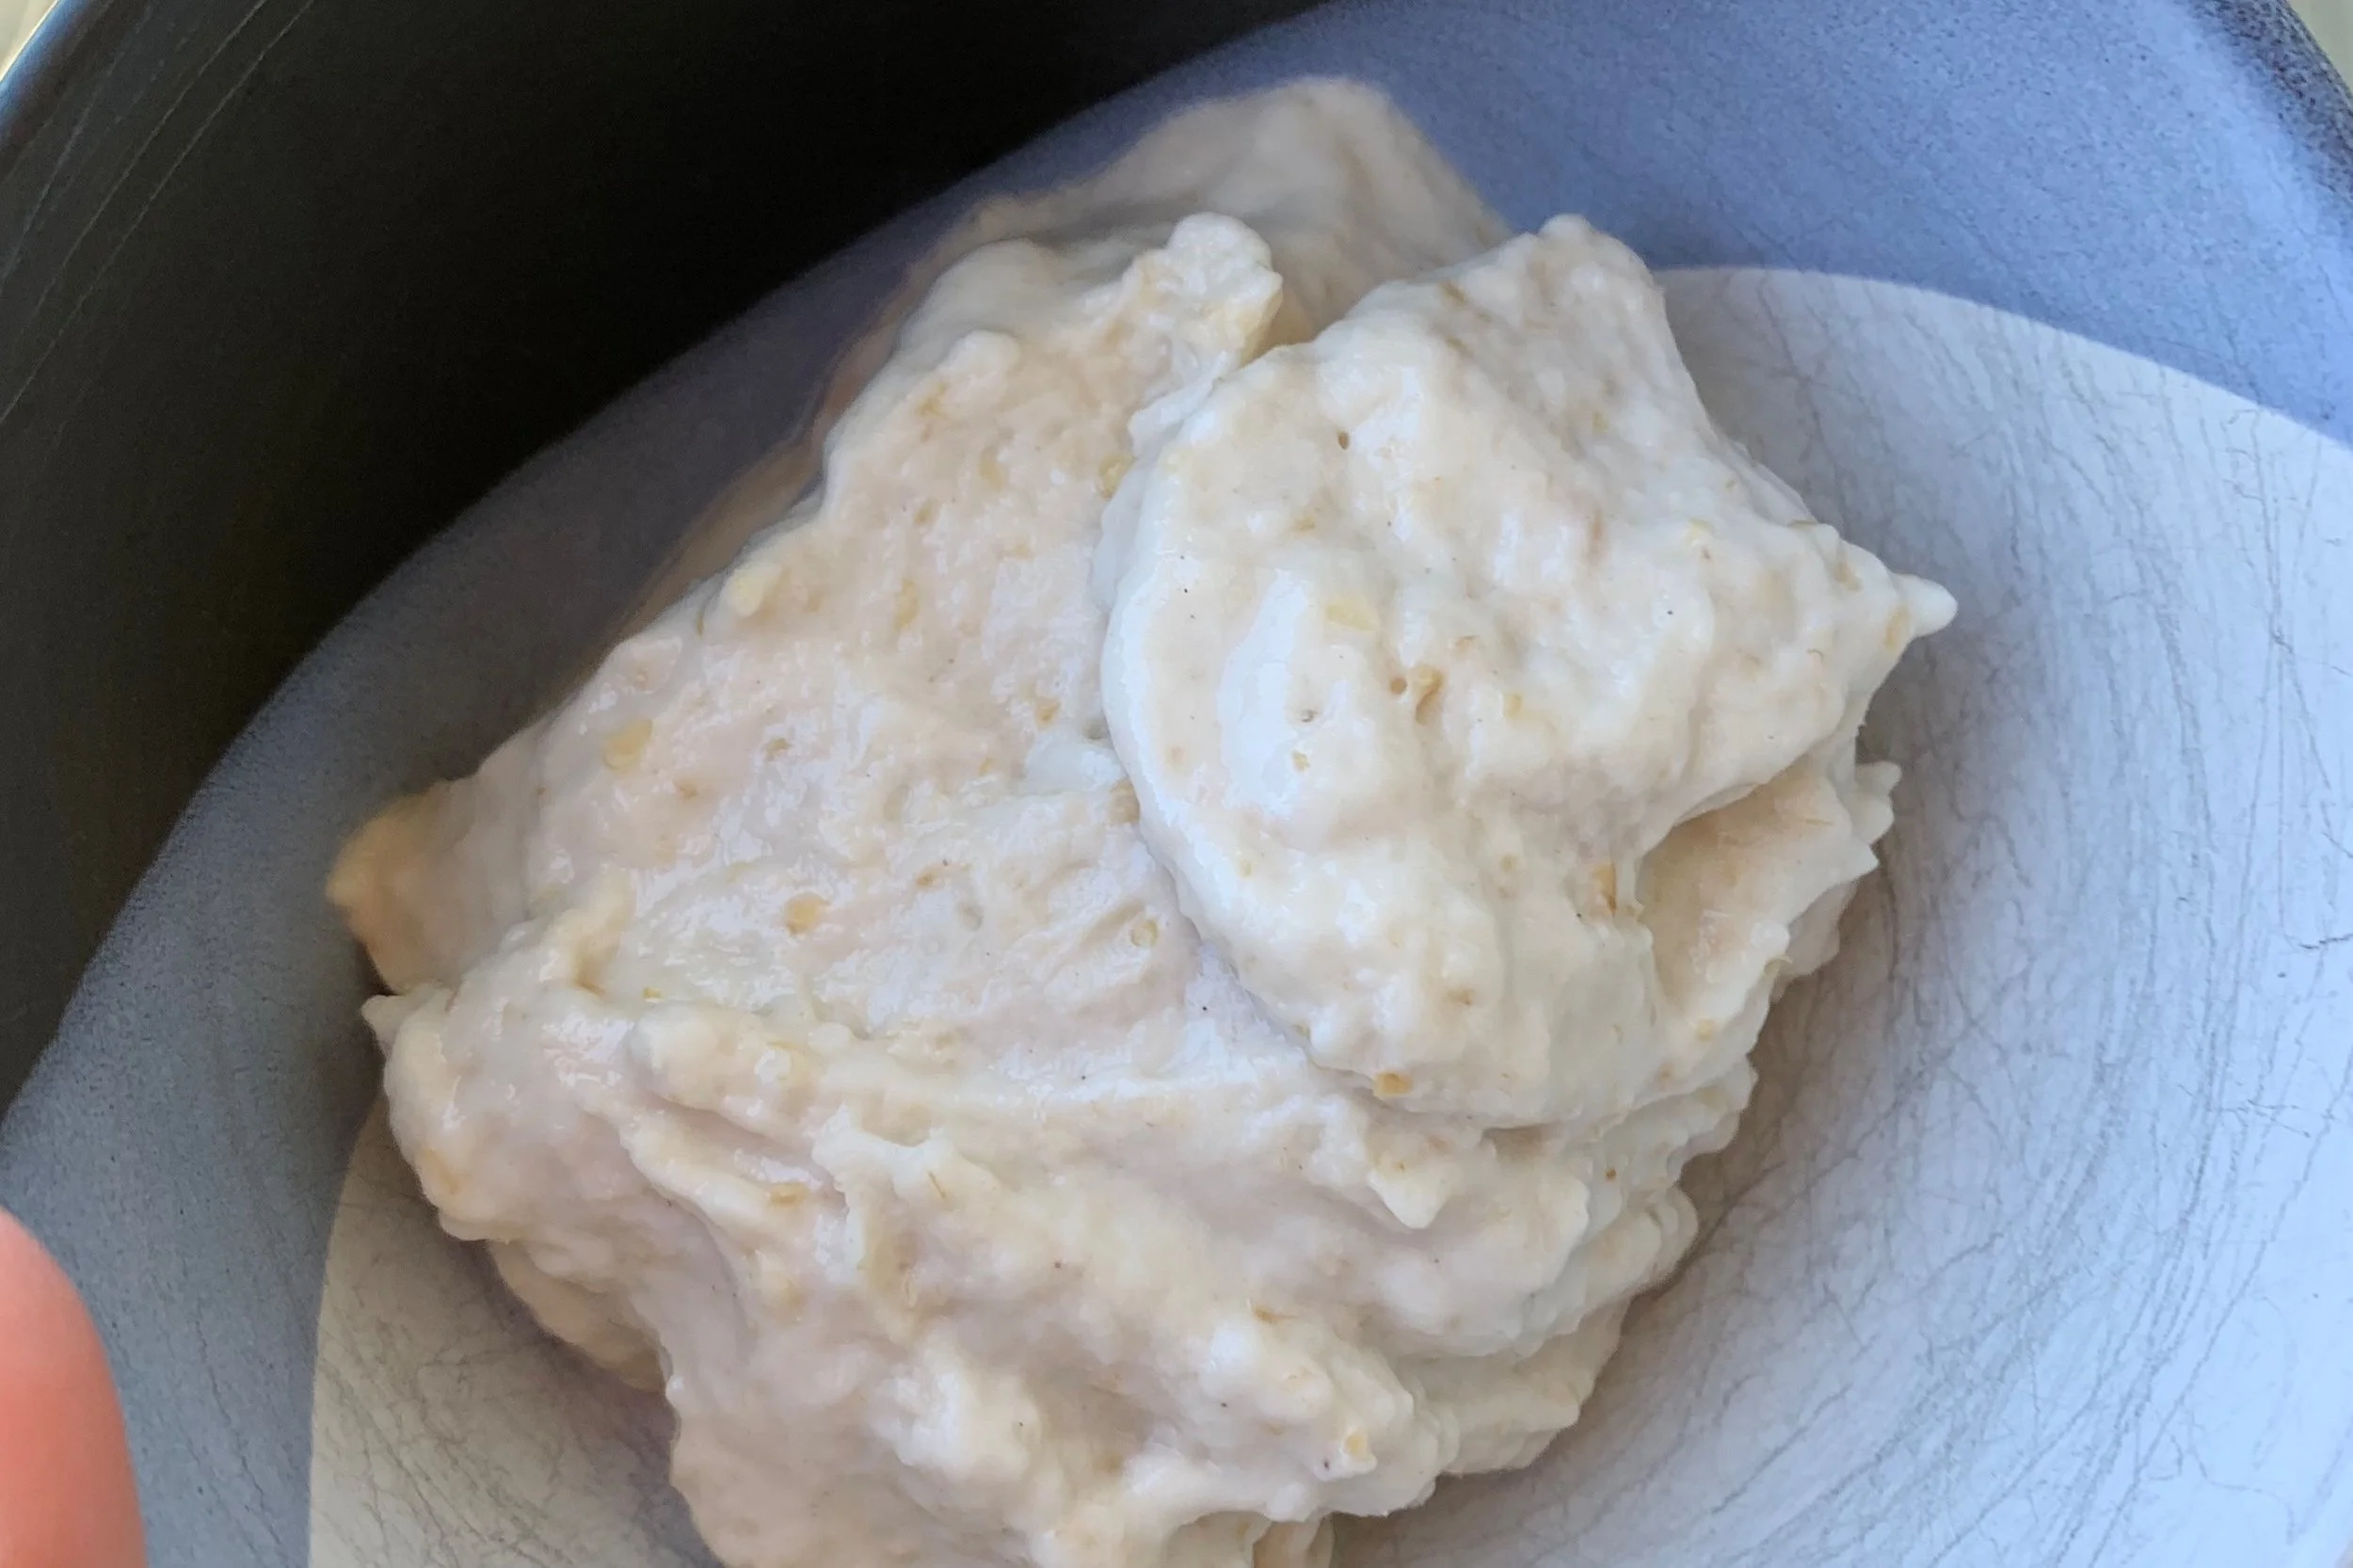
Mix 400g white flour, 100g wholemeal flour, with 375g of water in a large stainless steel bowl. I use a spoon for this but can do with hands!
Leave this flour and water for 30mins - this is the flour hydration stage
12.30pm
To ensure that the leaven is ready - take a small spoonful and test that it floats by putting in in a bowl of water. Give it an extra 30mins if it doesn’t float.
Save a small amount to continue your starter - pop in the fridge if you’re not baking for a while or leave at room temp if you plan to bake in next 3-4days (I recommend doing a small refresh feeding here if putting in the fridge).
Add 100g of the leaven to the hydrated flour and water.
Mix very well and rigorously (using the stretch and fold technique but do it for many more than just 4 turns, I try to go for a couple of minutes at least - the closest we get to kneading the bread at this point).
Leave for 30mins.
1pm
Add 10g of salt (dissolve in a small amount of hot water) - beginning of the bulk fermentation stage
Mix very well and rigorously (same as last time, stretch and fold technique for a few minutes).
Leave for 30mins
1.30pm
First turn
With the first 4 turns (which are 30mins apart) you can be quite rough but for the last couple (which are an hour apart), be gentle. We don’t want to squeeze the air out! We want that air trapped into the dough.
2pm
Second turn
2.30pm
Third turn
3pm
Fourth turn
4pm
Fifth turn
5pm
Sixth turn - test if it’s ready!
By this point it’s had four hours of bulk fermentation. (If it’s warm, 4 hours should be enough but it might need up to 6 hours).
Over the last 4 hours it should have got a lot bigger and lighter. You’ll know if it’s ready by the finger press test - you should be able to press your finger into the dough and it should bounce back somewhat but a little bit of the indent should be left behind. If it’s not bouncing back at all - give it another hour! If the dough is bouncing back too much - it’s over done but that’s ok, just continue as if it’s done (this is unlikely to happen).
If it’s ready - it’s time to prepare to put in the fridge overnight!
Lay a tea towel over a bowl (or banneton if you have one!) and sprinkle plenty of flour (not enough flour and the dough will stick to the material!) Also sprinkle flour onto a clean bench
Turn the dough out into the floured spot of the bench and fold carefully into a little package (video coming soon or check the resources out below).
Cover with tea towel and pop into the fridge!
Baking Day
SATURDAY
1hr before you want to bake
Put dutch oven inside oven and turn on to 220 degrees
Baking time!
Reduce oven to 200 degrees and carefully take dutch oven out.
Flip dough from teatowel into dutch oven (carefully!). (I do an extra little tuck here - I’ll try to make a video of this soon).
Use scissors to make cuts on top of dough
Put in oven with lid on
20mins later (always put an alarm for this one - try important!) take lid off (Dutch oven very hot so be very careful)
Leave in oven for 40 more minutes without lid (bread in oven for 1 hr in total).
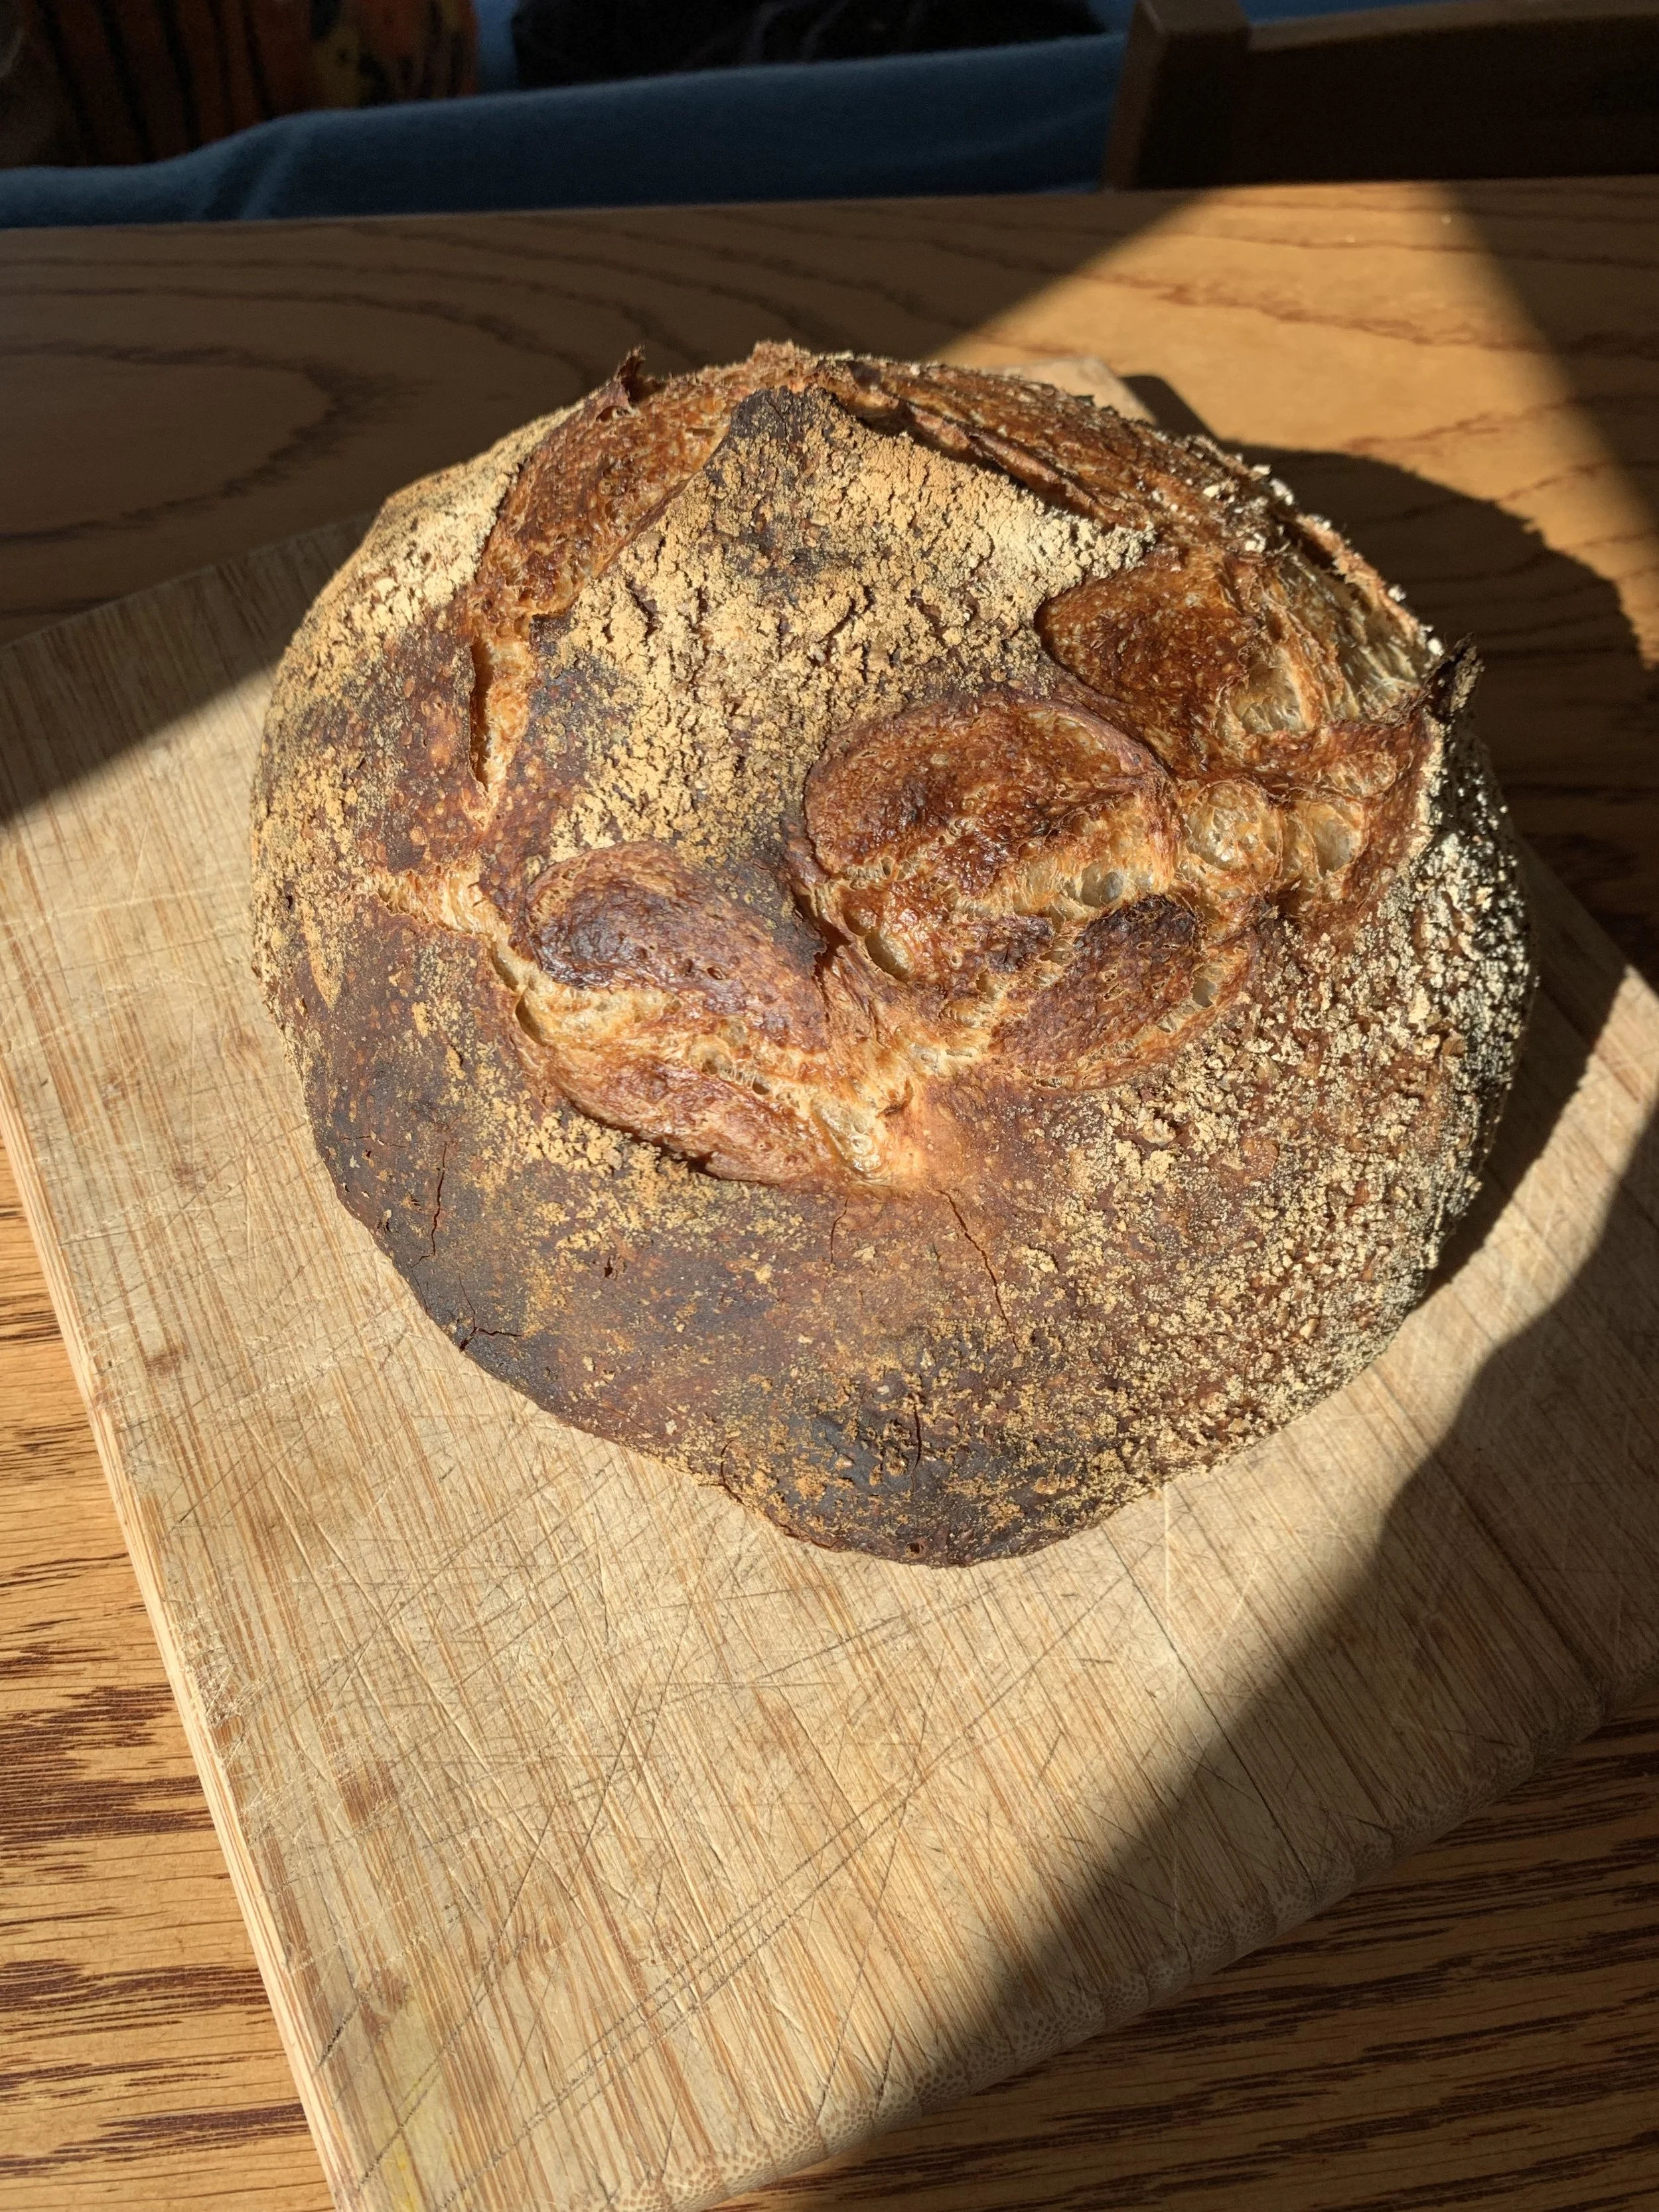
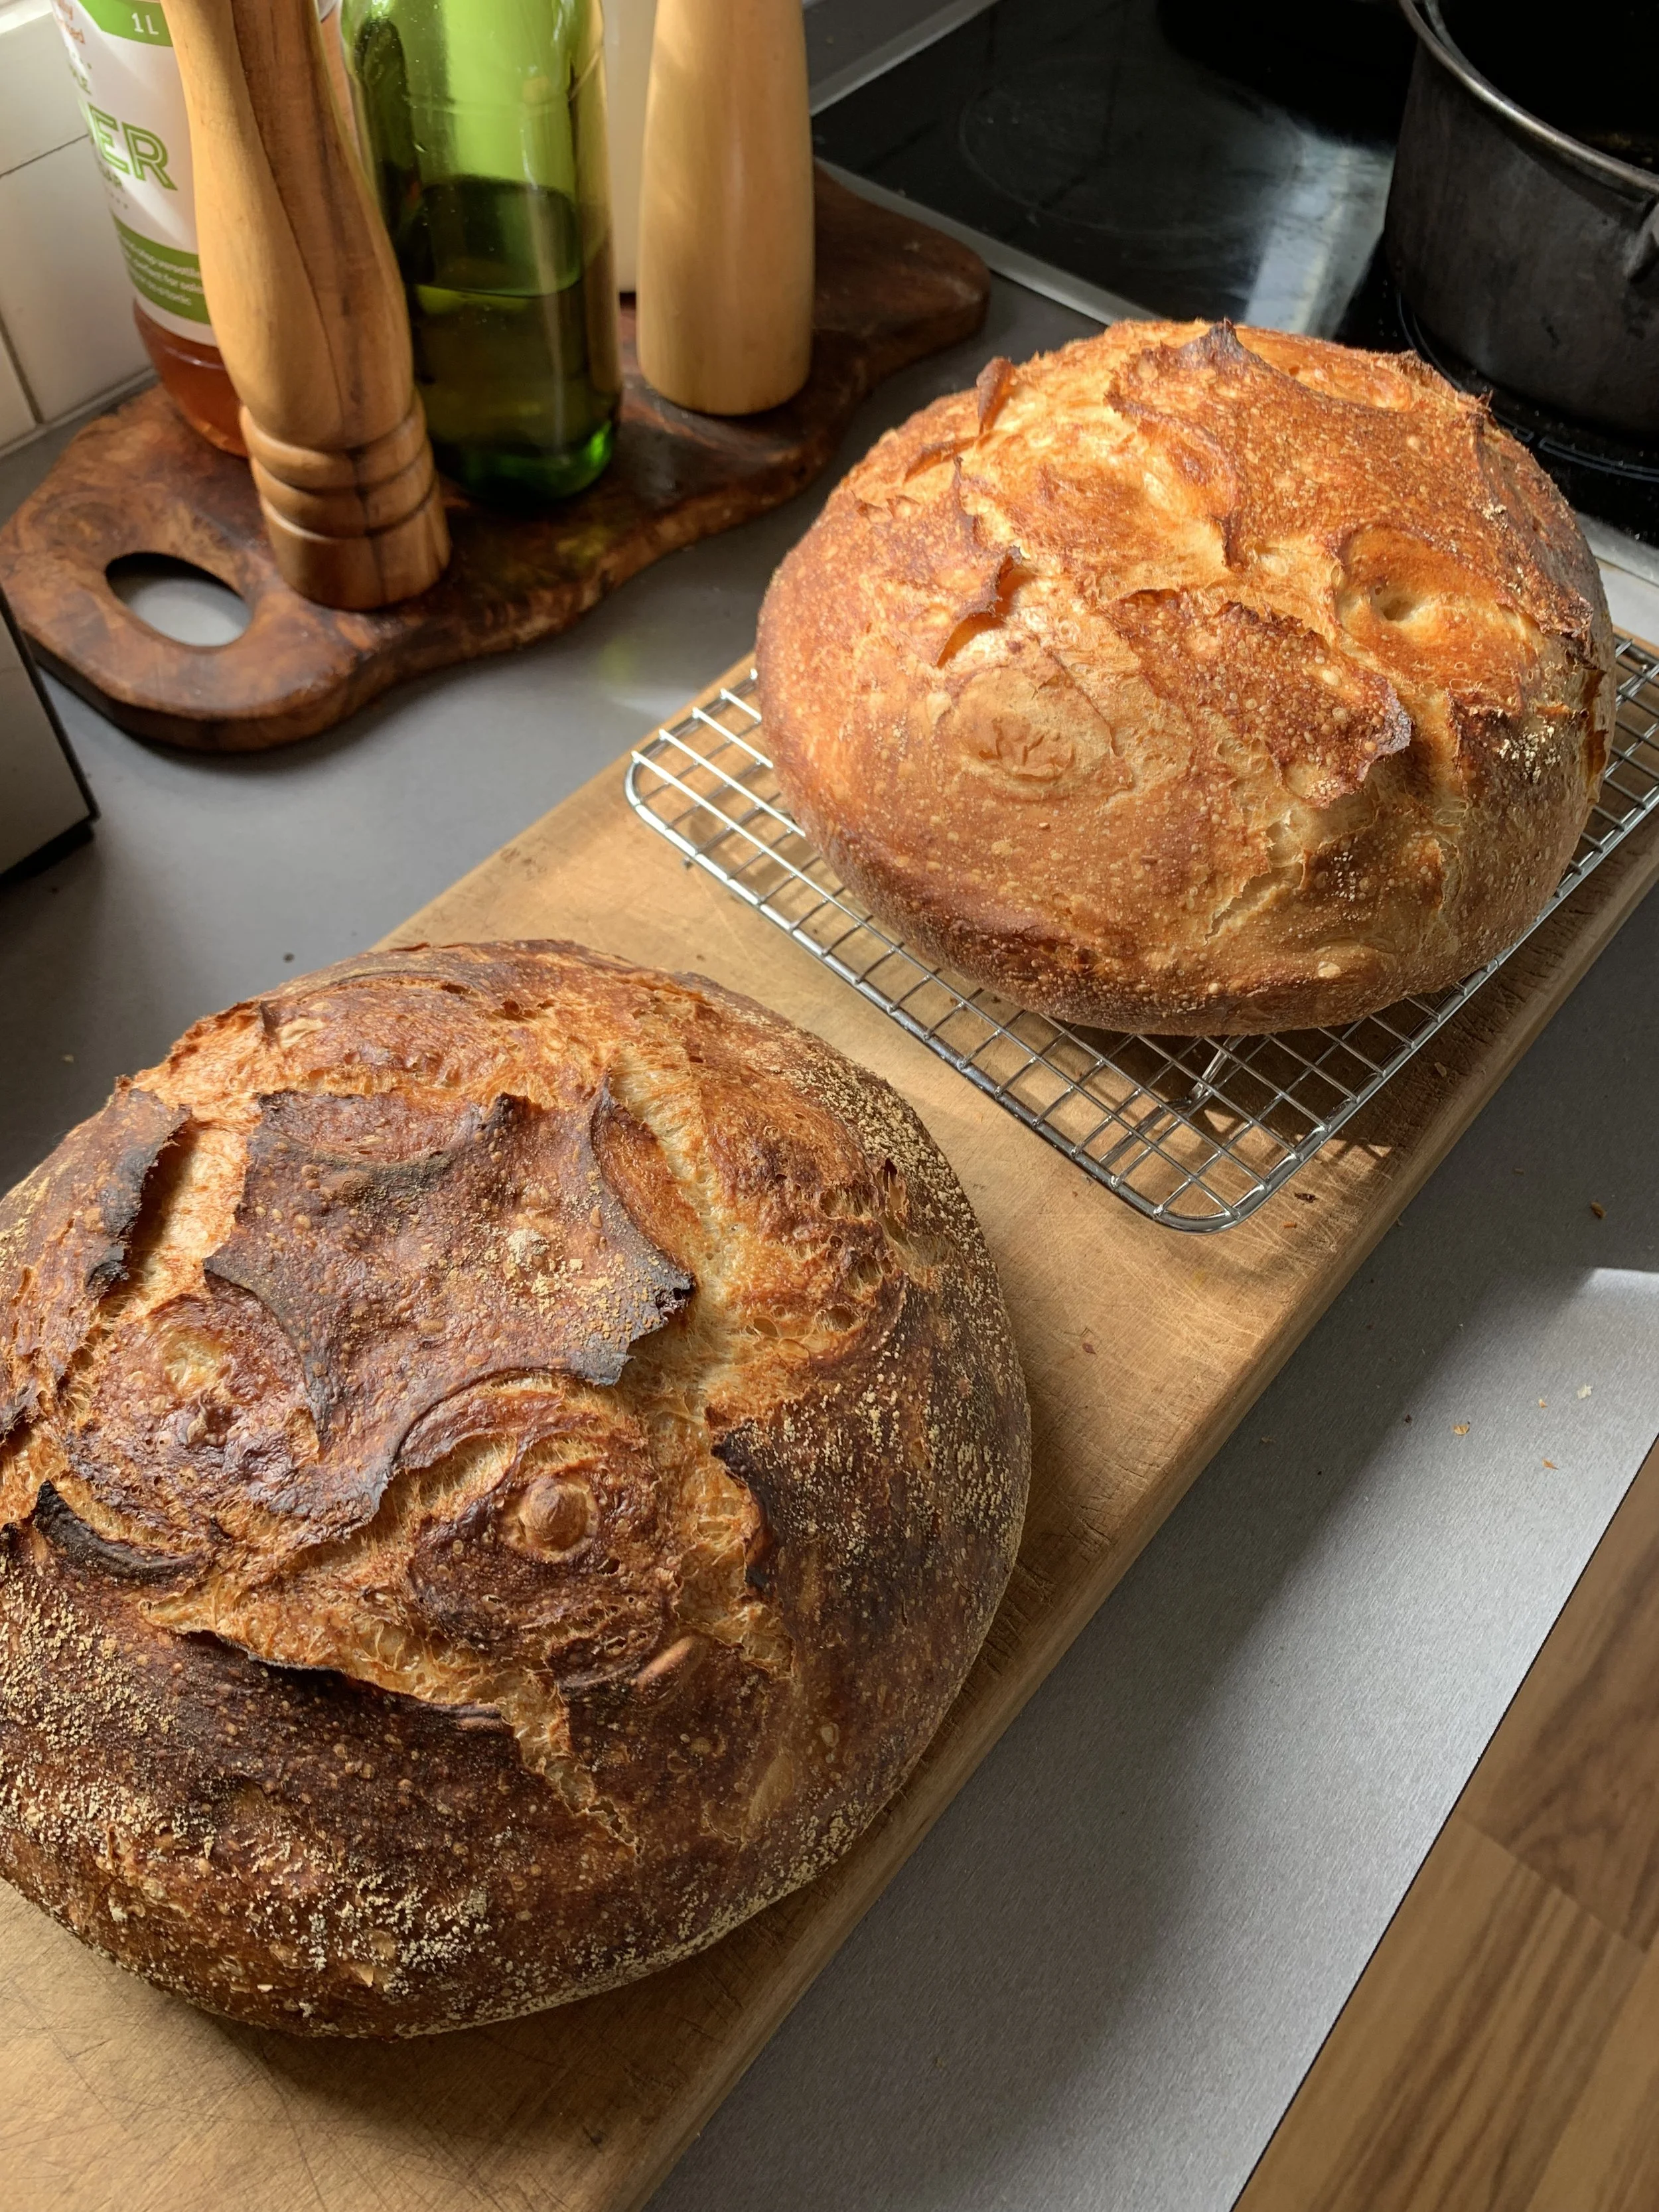
Ready..!
Take out of oven and carefully flip out of dutch oven onto wire baking rack to cool for 1 hour. Very tempting but don’t skip this as the inside is still cooking! The bottom of the loaf should sound hollow when you tap it.
ENJOY!
Additional Resources
This is a great website that has some epic resources - lots of other sourdough recipes and schedules etc. https://www.theperfectloaf.com/beginners-sourdough-bread/
Good videos that talk through things (bearing in mind timings/recipe may be slightly different to what I’ve given you)